IPTV Smarters Pro recording function
Recording a content for IPTV users is becoming a demanding feature these days but not all application offer that. IPTV Smarters Pro recording function is one of the many features this application offers and in this article we are going to see how it works.
The recording feature of IPTV Smarters Pro is only available to the android devices due to a more open access the android operating system offers to this application.
Another thing to keep in mind is that this application does not offer scheduled recording yet. So to record, as you will see below, you should initiate the recording process manually.
In this article we are going through:
-
Recording prerequisites
-
What to expect from the recording feature of IPTV Smarters Pro
-
Recording content with IPTV Smarters Pro
-
Checking the recorded content file
Recording prerequisites
Before we proceed with IPTV Smarters Pro recording function, there are things need checking first:
-Extra concurrent connection(s)
For the recording function, you need at least 2 concurrent connections allowed on your IPTV subscription. So for instance if you are running a IPTV free trial, make sure to ask your IPTV provider to enable you the extra simultaneous connection as recording needs it's own separate connection slot even if you watch the same channel as you are recording.
-Enough space to store the recording file
Before starting to record anything, make sure the destination where you are going to save the recording file is big enough to store the file. If the actual space on the device itself is enough and you're not playing for anything huge, then it's fine. Otherwise prepare an external disk or flash drive to set the recording folder there. You don't want your recording to be interrupted.
What to expect from the recording feature of IPTV Smarters Pro
IPTV Smarters Pro is not and should not be looked at as the ultimate IPTV application although it has many attributes which users can benefit from. IPTV Smarters Pro recording capability, as of 2023, is not yet to the best perfection. It can only work manually which translates to Scheduled recording not being an option. WHMCS Smarters say they are working on adding this feature as well as other features.
Recording content with IPTV Smarters Pro
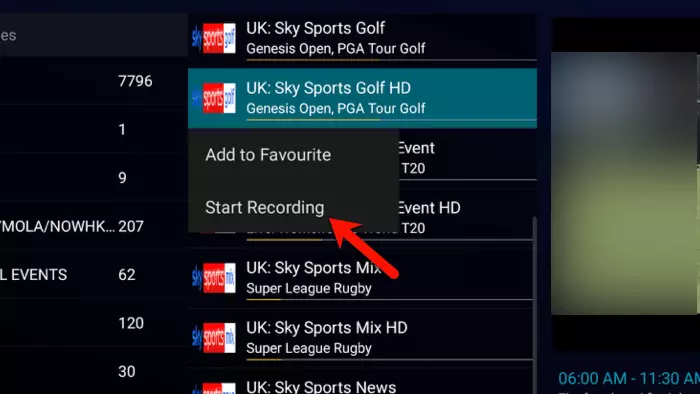
1-While on the channel list page, hold the touch or the middle button on the remote on any channel you want to record. Then click Start Recording.
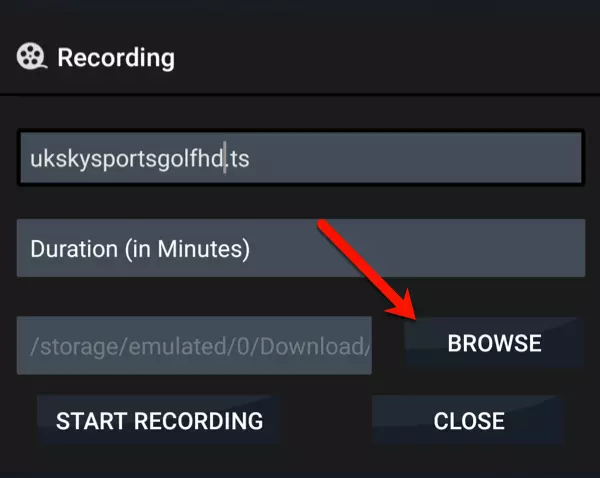
2-This is where you can set the recording settings. For now click Browse and let's sort the recording folder path. Later we will come back here and tweak a few things.
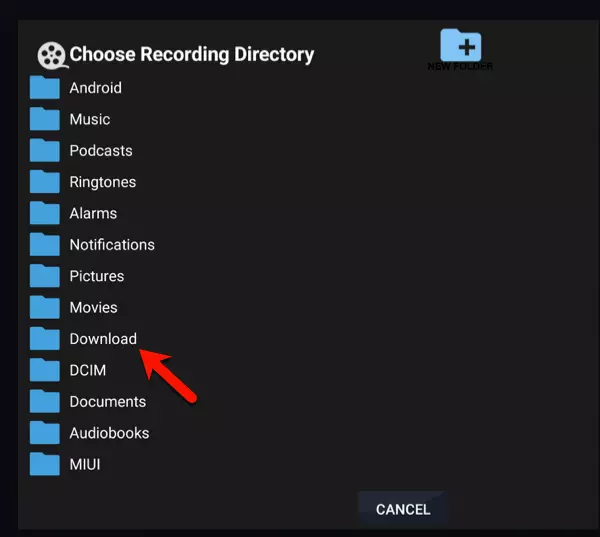
3-You can make the recording path in almost any folder on your android device. Let's do this in Download folder.
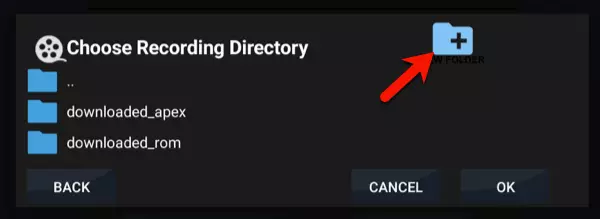
4-Click the add folder sign at the top to make a new folder inside Download folder - in which we are currently.

5-Choose a name for it and click OK.
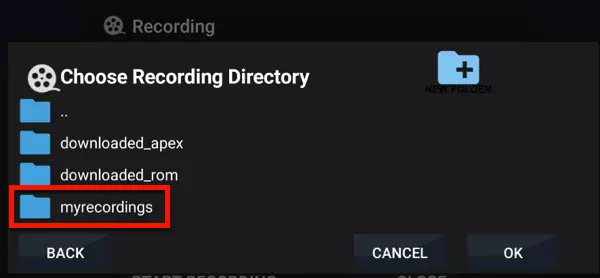
6-The new folder is created. Open it.

7-By click OK here, the recording path will be set to the new folder we have just created.
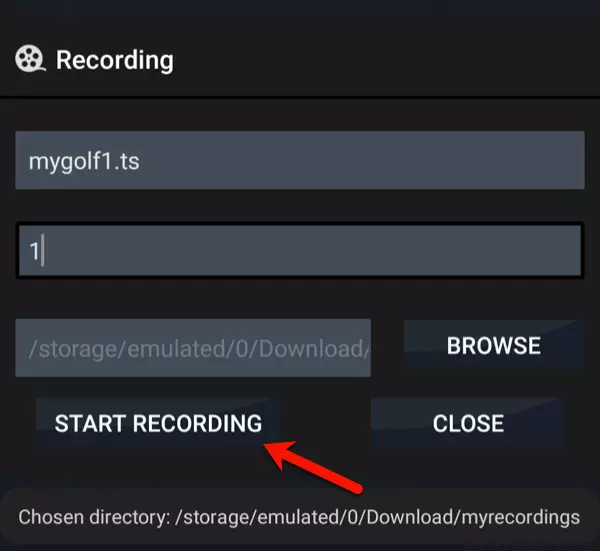
8-Message at the bottom of the screen confirms that.
If you want, you can rename the recording file name (first field above) but make sure .ts remains at the end.
The duration of the recording is determined by the number in the field below the name. I have set it to 1 which means 1 minute of recording.
So, if I click Start Recording, the chosen channels in step 1 will be recorded for 1 minute and the recorded content will be saved in a file called mygolf1.ts
Once again, for the IPTV Smarters Pro recording to work properly, remember to ask your IPTV provider to enable you an extra connection on your account. You may need to pay extra for that.
Click Start Recording.

9-A message at the bottom of the screen confirms the start of the recording process.
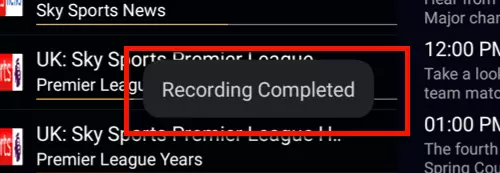
10-Once the recording is completed, you should see the following message. Now go back to the dashboard of IPTV Smarters Pro.
Checking the recorded content file

1-From the top right, click on the camera icon to open recording section.
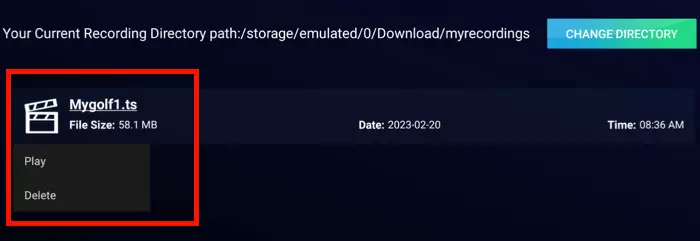
2-The recorded file is available here and you can play it by click on it. You can change the recording path for future recordings if you want. Also, using a fire explorer, you can obtain the recorded content file, move it to another device and play it there.
Conclusion
IPTV Smarters Pro recording function is on of the many features that this great application has to offer. However, it is a manual feature and scheduled recording is yet to be implemented. Enough space on the recording destination and have one xtra connection on your IPTV accounts are two important factors to check before starting the recording process.